| Panel | ||||||
|---|---|---|---|---|---|---|
| ||||||
Please read the Terms of Use for Materials on ZennoLab |
| Info |
|---|
Unfortunately, an English translation is not yet available. This page is in the process of being translated into English. Sorry for the temporary inconvenience. |
Для подключения смартфона к ZennoDroid требуется выполнить ряд простых действий. К сожалению, написать универсальную документацию по подключению невозможно т.к. процесс настройки может отличаться, взависимости от производителя, версии Android и UI оболочки.
Данная документация написана на основе тестирования несколько типов устройств. Если у Вас что-то не получится, обратитесь в службу поддержки.
Что требуется?
Включить режим разработчика
Включить отладку по USB
Подключаем к ZennoDroid
Connecting your smartphone to ZennoDroid requires a few simple steps. Unfortunately, it’s impossible to write general documentation. The setup process may differ depending on the brand, Android version and UI Shell.
This documentation is based on testing several types of devices. If something doesn’t work out for you, please contact support.
What you should do?
Enable developer mode
Enable USB debugging
Connect to ZennoDroid
Enable developer mode on Android versions 4.2 - 10
Выполните следующие действияFollow these steps:
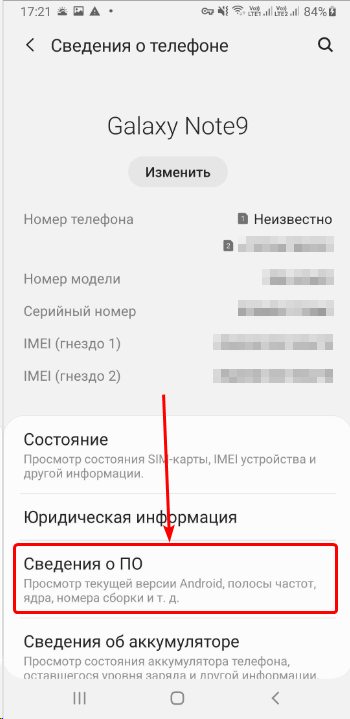
Откройте настройки устройстваПерейдите к пункту «Номер сборки». Если такого пункта нет, нажмите на «Сведения о ПО», после чего должен открыть нужный раздел.
Open device settings.
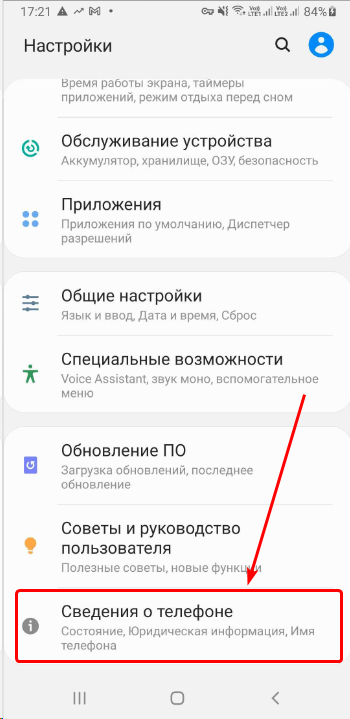
Нажмите на раздел «О телефоне» / «Сведения о телефоне»
Click on «About phone/device».
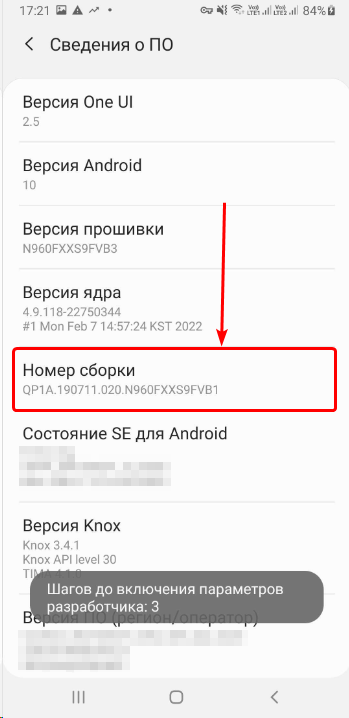
Go to «Build number». If there is no such item, click on «Software information», then you’ll see the necessary section.
Click the «Build number» several times.
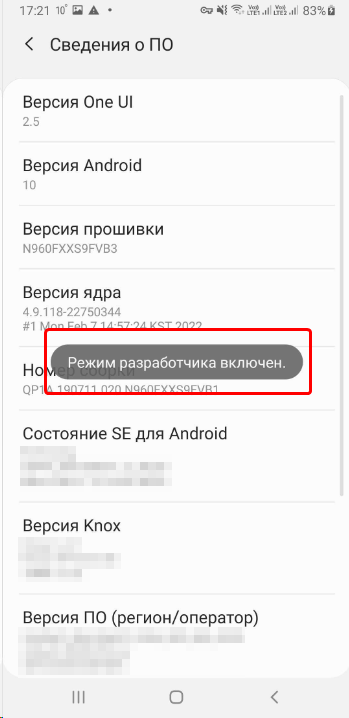
В результате ваших действий на экране устройства появится всплывающая надпись «Вы стали разработчиком!».
4. As a result of your actions you’ll see on a device screen a pop-up message «Developer mode has been enabled».
5. You’ll see a new item «Developer options» in the phone settings menu.
Включаем отладку по USB в режиме разработчика
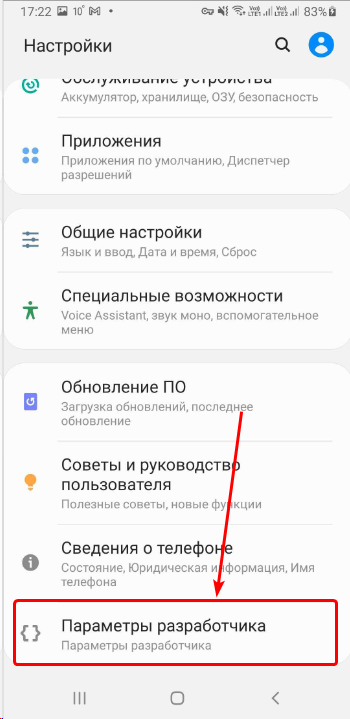
В настройках находит новый пункт “Для разработчиков“ или “Параметры разработчиков“. Название может отличаться от вашего.
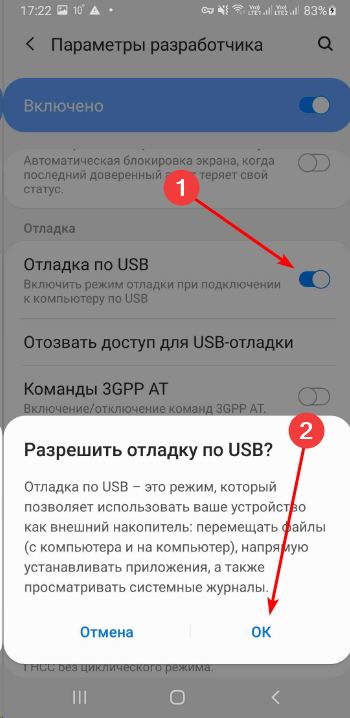
Находим пункт “Отладка по USB“. Включаем и подтверждаем.
Подключаем устройство к ZennoDroid
Подключите смартфон с включенным режимом отладки к компьютеру с установленным ZennoDroid по USB.
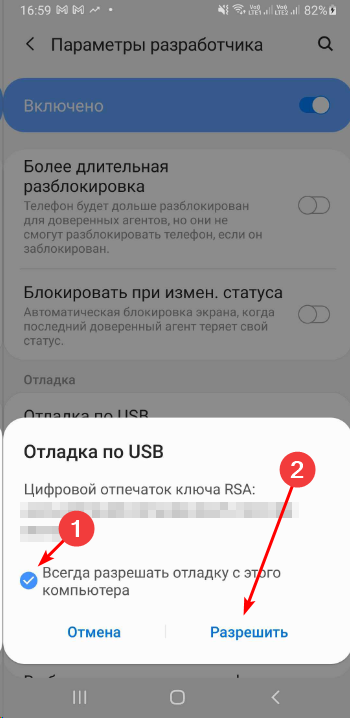
После чего появится запрос - “Разрешаете ли Вы отладку с этого компьютера”. Ставим галочку и жмём “Разрешить“.
Запускаем ProjectMaker for ZennoDroid
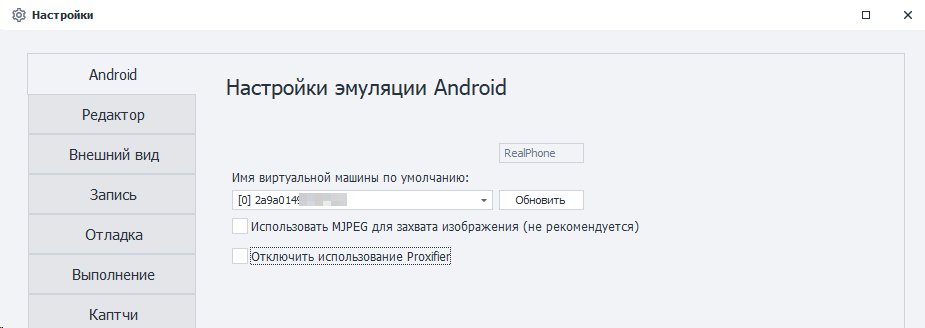
Открываем Настройки → Android и убедитесь, что подключенное устройство доступно для выбора. Если в выпадающем меню пусто, нажмите “Обновить“. Если ничего не поменялось, свяжитесь со службой поддержки.
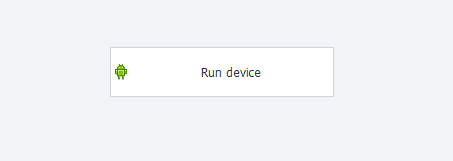
Создаём проект или открываем уже существующий. Жмём кнопку “Запустить устройство“ в окне “Устройство“:
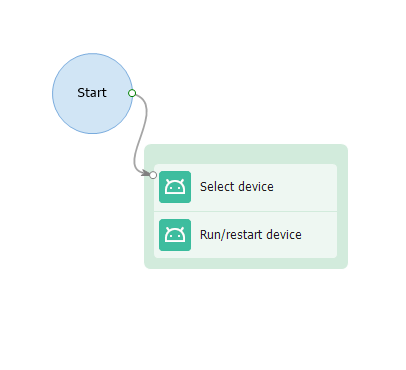
Либо запускаем устройство через экшены “Выбрать“ и “Запустить“.
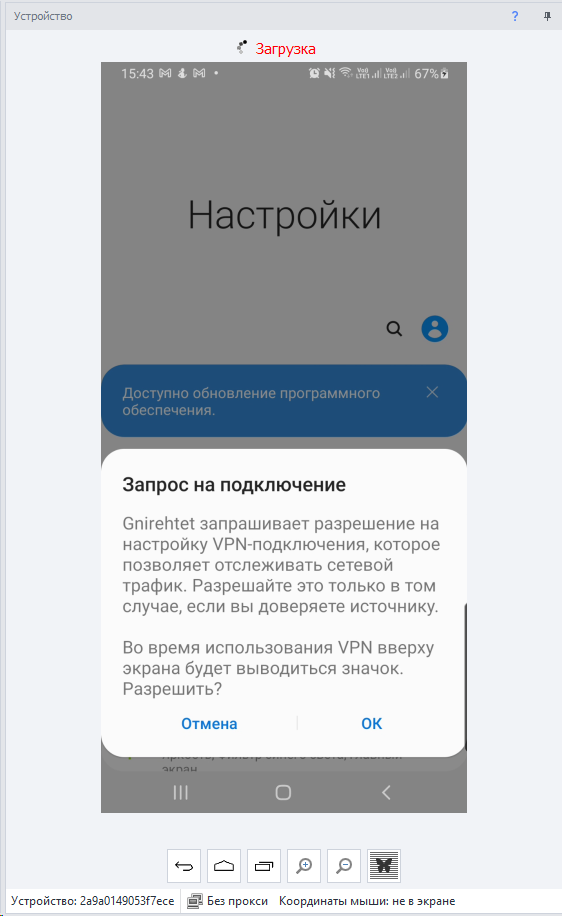
При запуске устройства в ProjectMaker появится запрос на настройку VPN-подключения Gnirehtet. Разрешение требуется для корректной работы прокси.
Также будет установлено несколько приложений в фоновом режиме:
com.genymobile.gnirehtet для использования проксиEnable USD debugging in Developer mode
In the settings, find the new item «Developer options» or «For developers». The name may be different.
Find «USB debugging». Enable and confirm.
Connecting the device to ZennoDroid
Connect your smartphone with enabled debugging mode to the computer with ZennoDroid installed via USB.
After that, you’ll see a request: «Allow USB debugging?». Check the box and click «Allow».
Run ProjectMaker for ZennoDroid
Open Settings → Android and make sure the connected device is available for selection. If the drop-down menu is empty, click «Refresh». If nothing has changed, please contact support.
Create a new project or open an existing one. Click «Run device» in the «Device» window:
Or run the device via the «Select» and «Start» actions.
When starting the device, ProjectMaker will prompt you to set up a Gnirehtet VPN-connection. It is required for correct proxy work.
| Info |
|---|
Also there will be several apps installed in the background:
|
| Expand | ||||
|---|---|---|---|---|
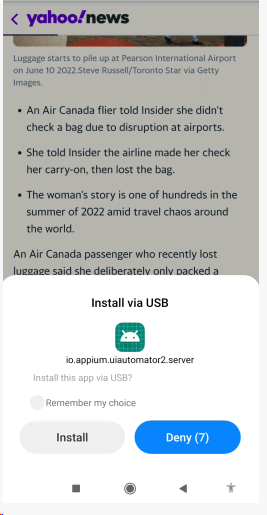
| На некоторых телефонах не удаётся произвести фоновую установку вышеописанных приложений. В таком случае можно появится окно об разрешении установки. Подтвердите установку каждого из них - это требуется для корректной работы ZennoDroid
| |||
On some phones, it’s impossible to perform background installation of the above apps. In this case, there will be a window asking you to allow the installation. Confirm the installation of each of them – it required for the correct ZennoDroid operation. |
